
Enabling Conversion Tracking in Ninja Forms
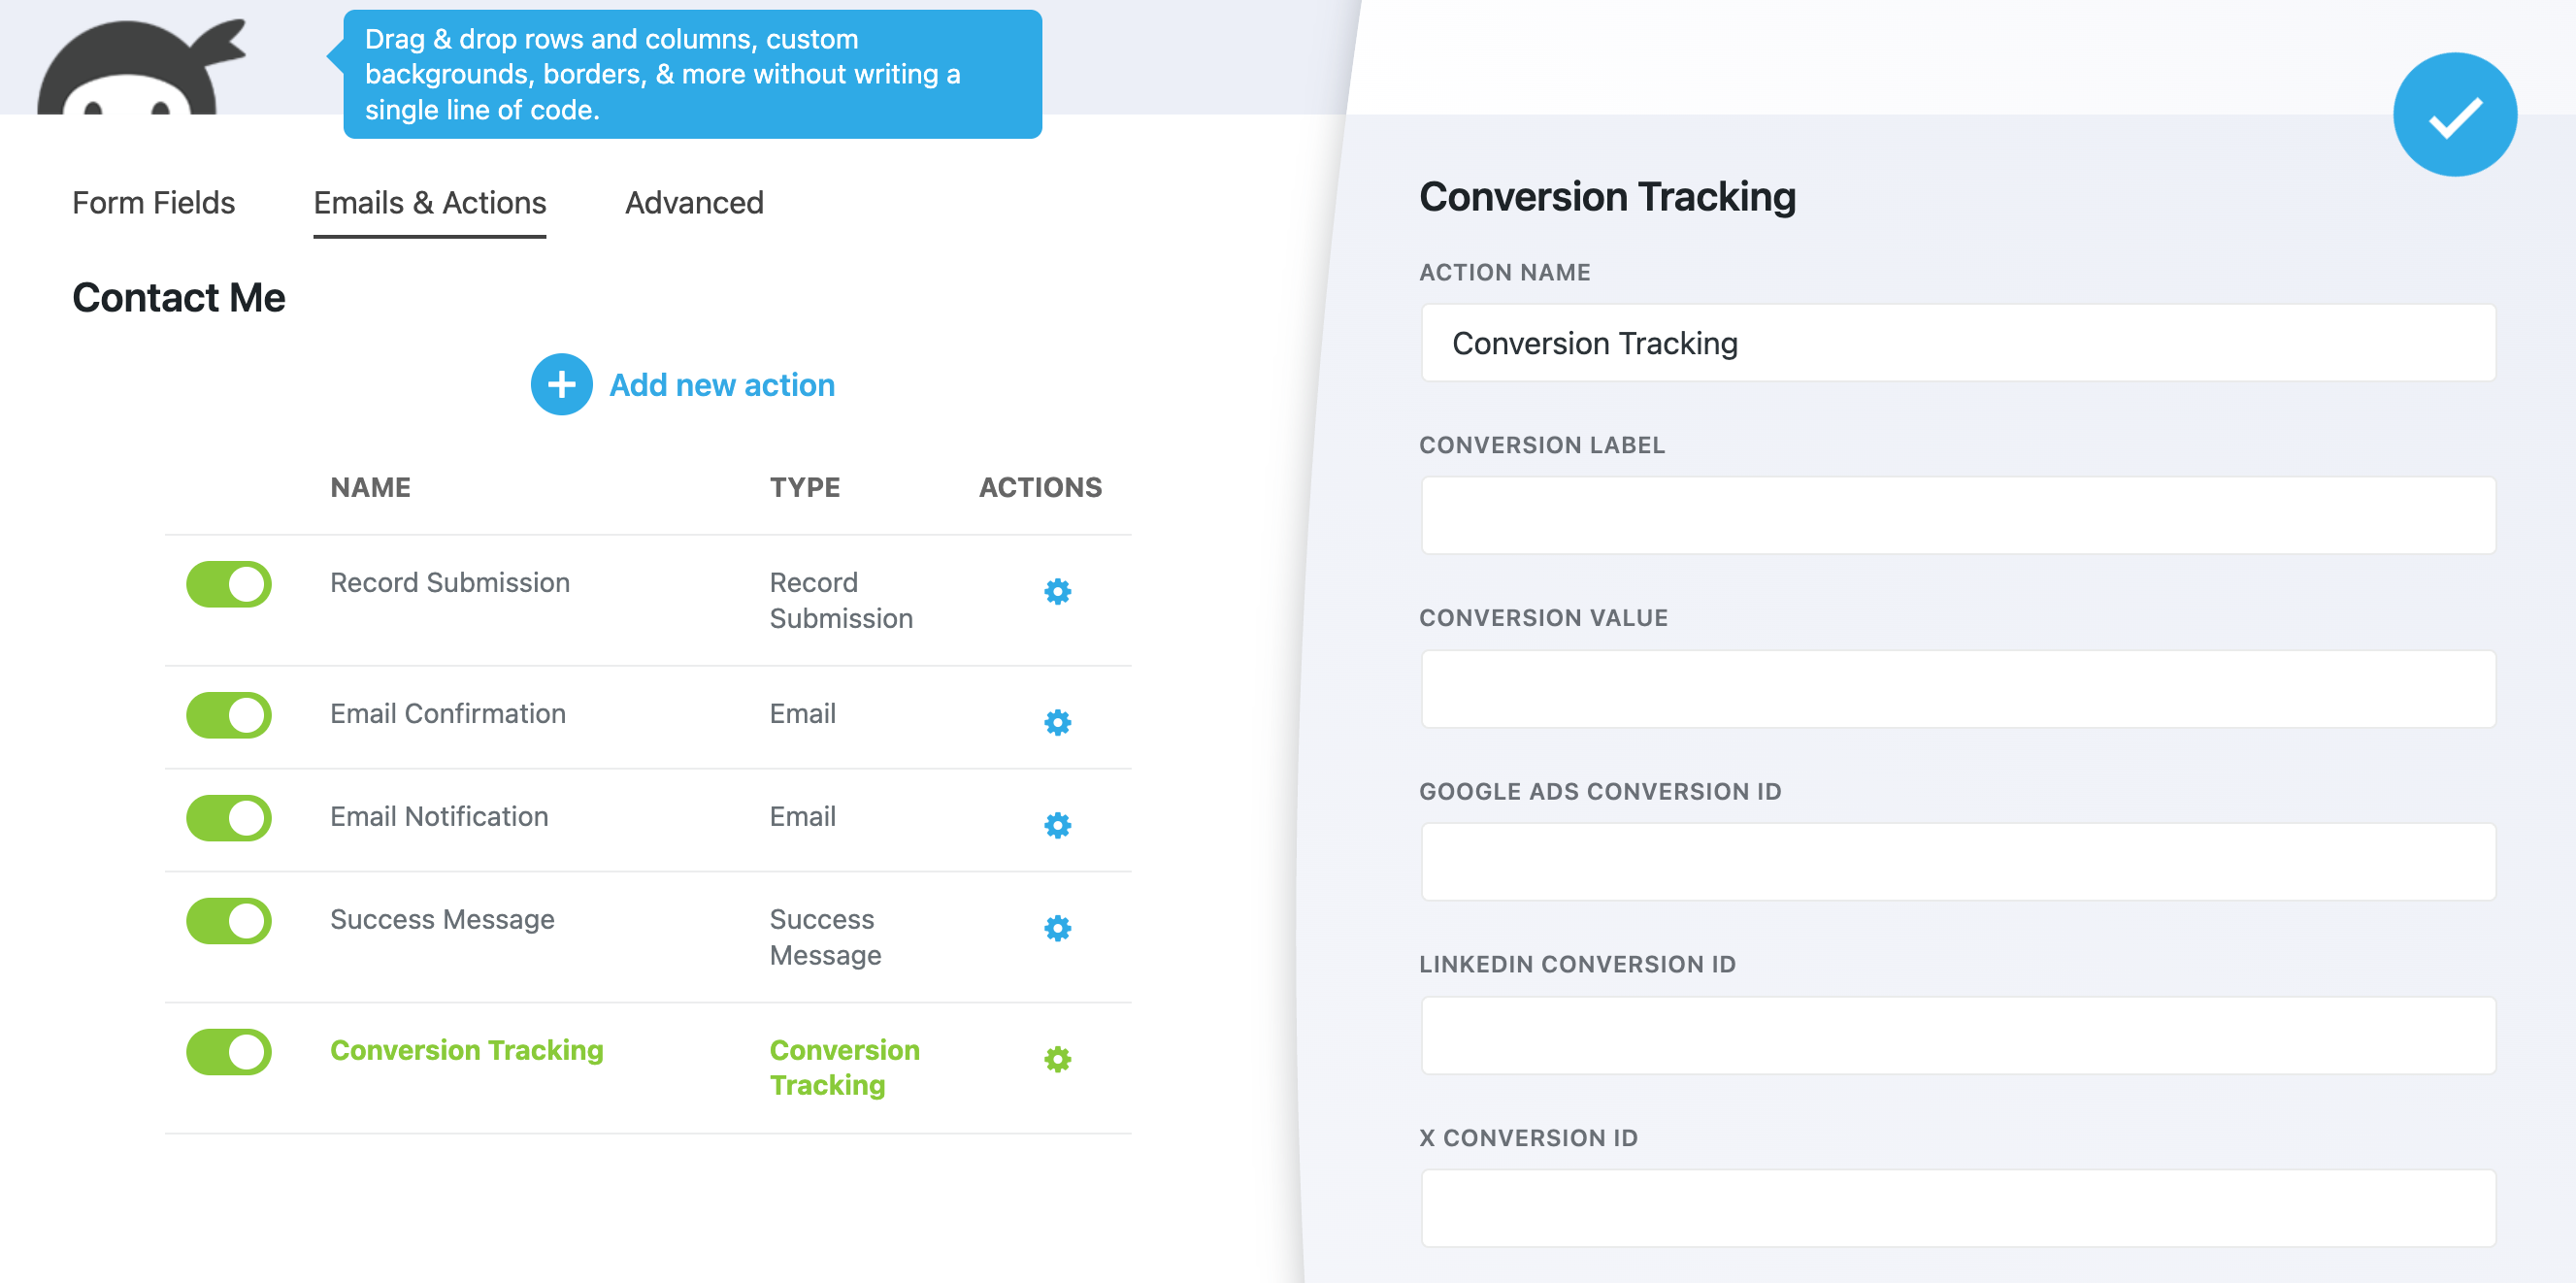
- For your form, go to Settings > Conversion Tracking
- Click the toggle to enable Conversion Tracking
- (Optionally) Enter a custom label and value
- (Optionally) Enter your Google Ads conversion ID
Sending Custom Form Data in Ninja Forms
The Conversion Bridge integration with Ninja Forms allows you to select specific form fields to be passed to your analytics or ad platform. Using the existing field assignment system, you can easily configure specific custom fields to be sent.
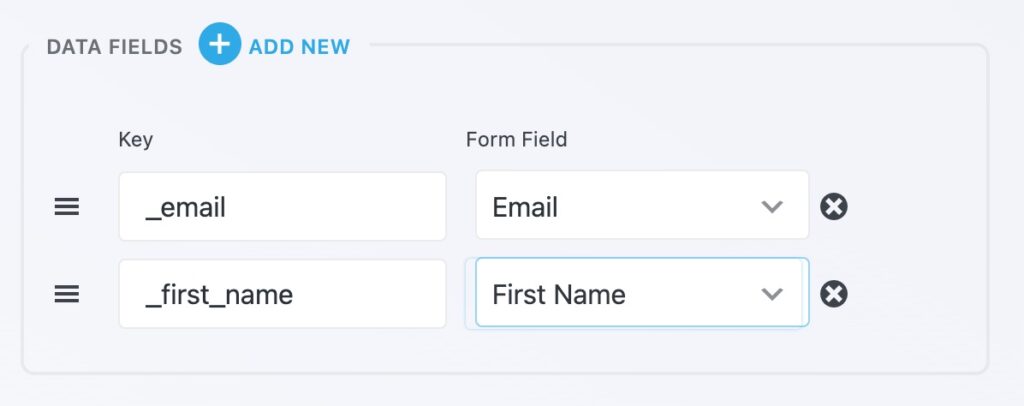
- In your Conversion Tracking action, find the Data Fields section
- Enter a custom key or select one of the pre-existing know Personally Identifiable fields (like First/Last Name, Email)
- Select a form field to populate the Value

Note: Personally identifiable information must prefix the "Key" with an underscore. For example, use "_email", "_first_name", or "_last_name". This tells Conversion Bridge this information to be treated as sensitive personal information. You are responsible for ensuring you properly indicate personally identifiable information and not doing so could violate the Terms of Use of your analytics platform.
Sending Enhanced Conversion Data in Gravity Forms
The Conversion Bridge integration with WS Form allows you to select specific form fields to be passed to your enabled ad platforms securely as enhanced conversion data. Adding values to be used for enhanced conversion data works exactly the same as custom form data described above, except you need to use specific Key values. Learn more about sending custom form data and personally identifiable information.
Including Conversion Journey in Emails
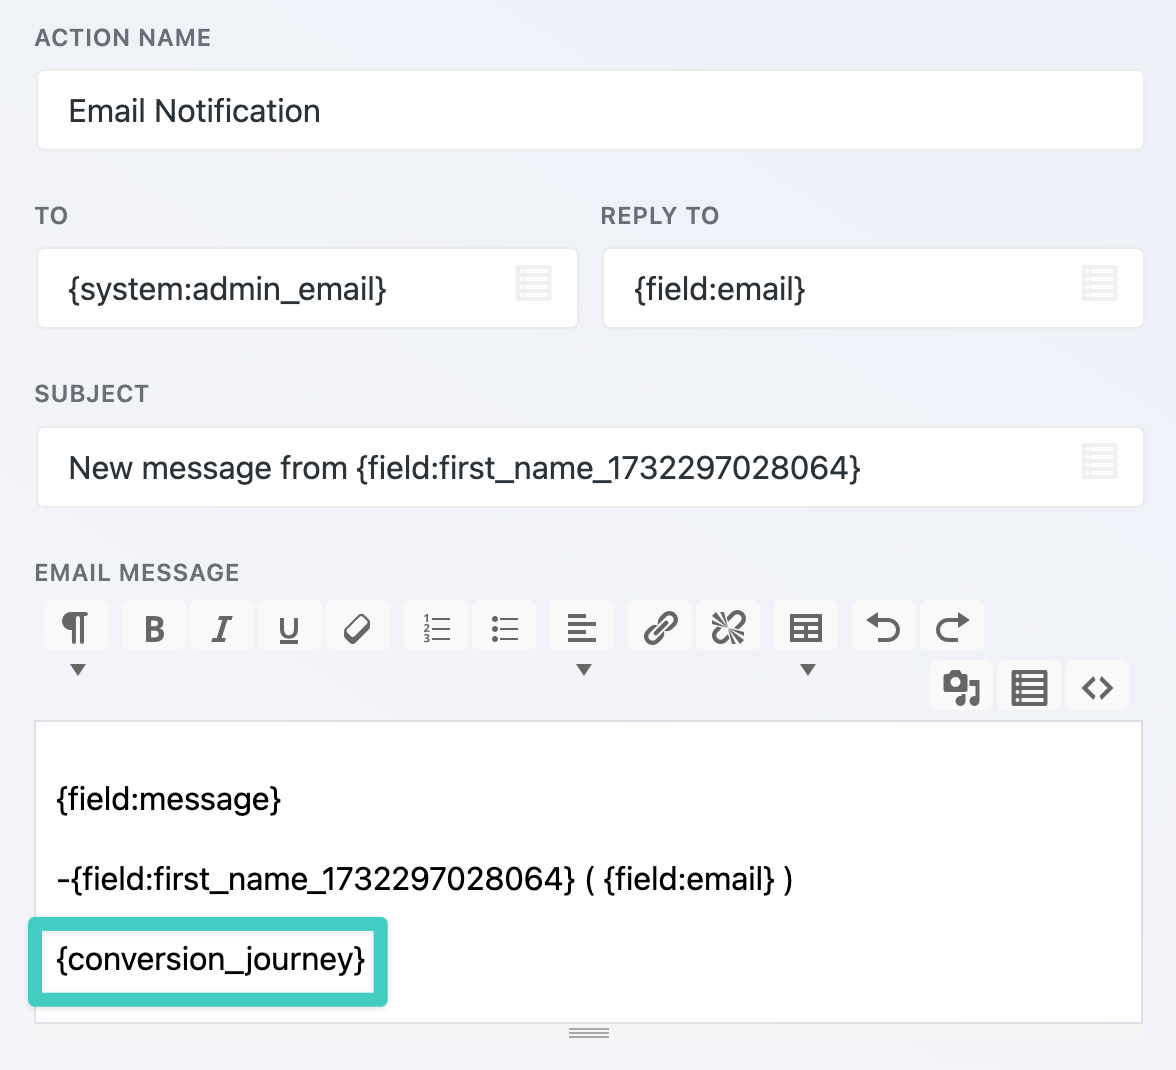
To include the Conversion Journey in the any of the emails (recommend only Admin notification emails), you can insert the {conversion_journey} merge tag within the content of the email you would like it to appear.
Pass UTM Parameters and Ad Click IDs
You can capture a visitor's UTM parameters and ad click IDs by adding a Hidden field to your form and setting its default value to a Conversion Bridge merge tag, like {cb:utm_source}. Ninja Forms' merge tag picker also lists the Conversion Bridge tags, so you can insert them without memorizing the syntax. The value gets saved with the submission, included in notification emails, and passed along to any connected CRM or webhook.
This is handy for offline conversion imports or for setting up conditional logic based on where a visitor came from. Ad click IDs, like {cb:gclid}, only fill in when the visitor has granted marketing consent. UTM parametersUTM parameters are tags added to a link that show where traffic comes from and which campaigns lead to real conversions. don't need consent on their own, but Conversion Bridge only remembers them from page to page once the visitor has accepted your banner, so before that they only fill in on the page that has them in the URL. See the full list of available tags in the guide on passing UTM parameters and ad click IDs into forms.