
Enabling Conversion Tracking in JetFormBuilder
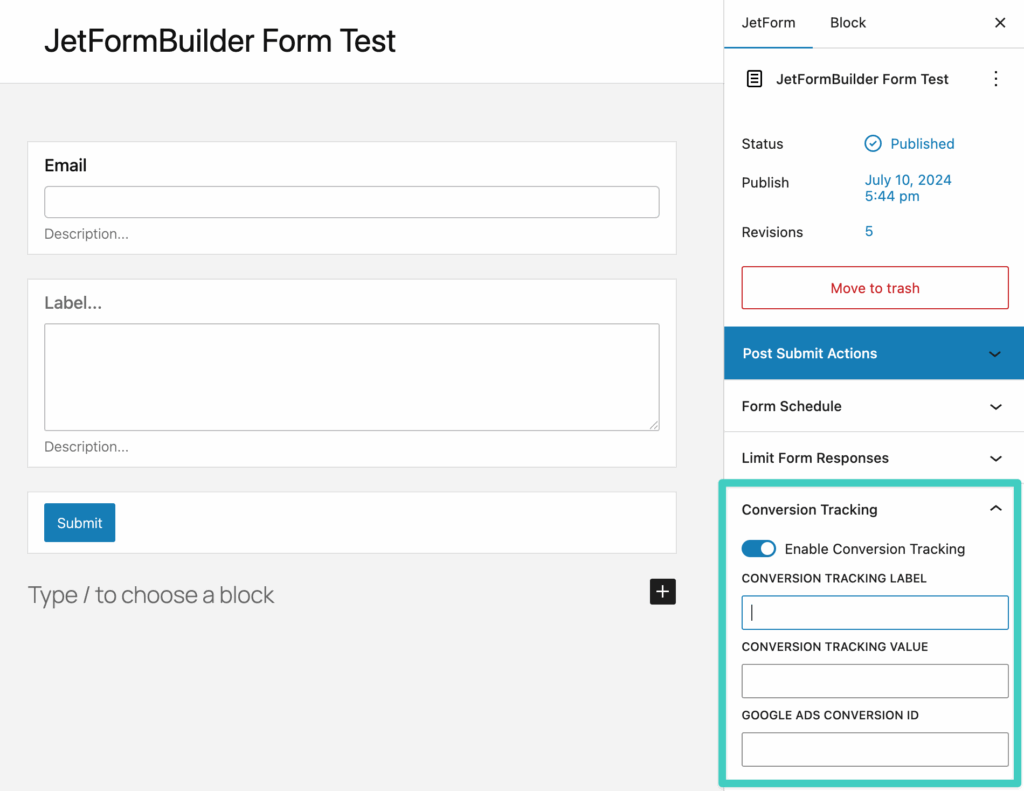
- Edit your form, Find the "Conversion Tracking" settings section
- Click the toggle to enable Conversion Tracking
- (Optionally) Enter a custom label and value
- (Optionally) Enter your Google Ads conversion ID
Redirecting to a Different Website
If your form redirects to another website after it is submitted, and the form's Submit Type is set to Page Reload or Default, the conversion cannot be recorded at the moment someone submits. The visitor leaves your site before it gets saved.
Conversion Bridge holds the conversion for up to an hour and records it the next time that person opens a page on your site. If they do not come back, it is not recorded.
Redirecting to a page on your own site works normally.
Sending Enhanced Conversion Data in JetFormBuilder
If you have enabled an ad platform and the respective Enhanced Conversions setting for it, then Conversion Bridge will automatically use the first email field found in the form to use for Enhanced Conversions.
Including Conversion Journey in Emails
To include the Conversion Journey in the any of the emails (recommend only Admin notification emails), you can insert the %conversion_journey% template tag within the content of the email you would like it to appear.

Pass UTM Parameters and Ad Click IDs
Add a Manual Input hidden field to your form and set its value to a Conversion Bridge tag, like {cb_gclid}. Conversion Bridge fills in the real value at submission, so it's saved with the entry, included in notification emails, and sent to any connected CRM, Zapier, or webhook feed.
UTM parameters, like {cb_utm_source}, don't need consent on their own, but Conversion Bridge only remembers them from page to page once the visitor has accepted your banner, so before that they only fill in on the page that has them in the URL. Ad click IDs, like {cb_gclid}, {cb_fbclid}, or {cb_msclkid}, only fill in once the visitor has given marketing consent. See Pass UTM Parameters and Ad Click IDs into Forms for the full list of tags.