Fluent Forms
The Fluent Forms integration tracks form submissions as conversions. You can configure tracking on a per-form basis through the form's own Settings tab, or fall back to the simpler global toggle in Conversion Bridge settings.
Per-Form Setup (Recommended)
Conversion Bridge registers itself as a native Fluent Forms integration. Open any form and you'll find a dedicated Conversion Bridge feed under Settings → Integrations → Conversion Bridge.
- In your WordPress admin, go to Fluent Forms and open the form you want to track.
- Click Settings → Integrations.
- Find Conversion Bridge in the list and click to add a new feed.
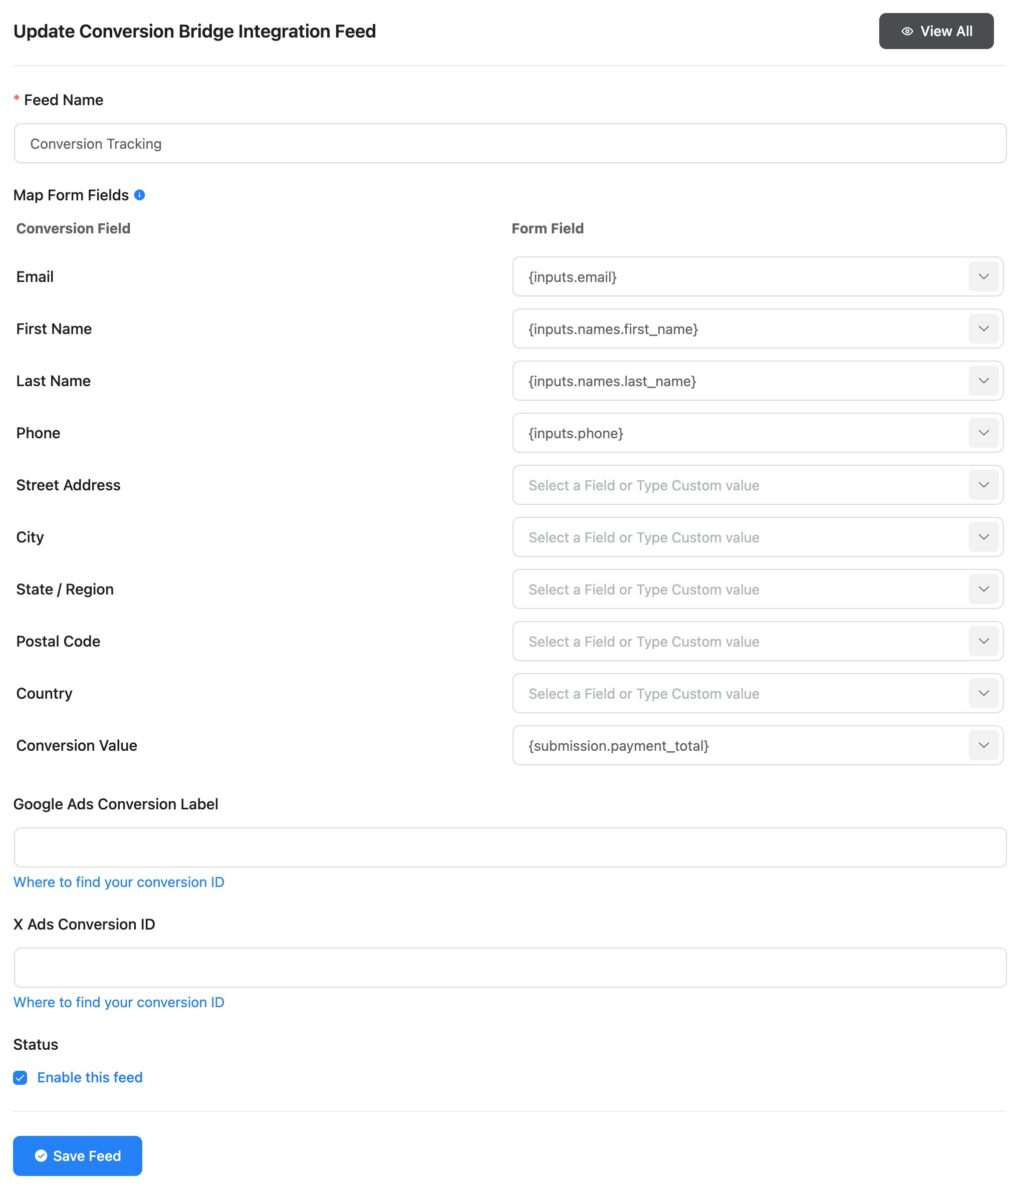
- Toggle the feed Enabled.
- Use Map Fields to connect your form fields to conversion tracking fields:
- Email, First Name, Last Name, Phone — used for Enhanced Conversions
- Address, City, State, Postal Code, Country — extra address fields for Enhanced Conversions on platforms that support them (Meta, Google Ads)
- Value — the conversion value for this submission. Map this to any form field, including number inputs, payment fields, item quantity, or the special
{submission.payment_total}shortcode for the form's calculated payment total
- (Optional) Fill in per-platform conversion IDs (Google Ads, LinkedIn, X) directly on the form. These override anything set in the Conversion Bridge settings page for this form.
- Save the feed.
Once the feed is enabled, the form is tracked automatically with the fields you've mapped. You don't need to enable anything in the main Conversion Bridge settings.
Mapping the Conversion Value
The Value field is flexible:
- Map to a regular input or number field to use whatever the visitor entered.
- Map to a Payment Summary field to use the displayed total (handles dynamic prices, item selection, and quantities).
- Use the
{submission.payment_total}shortcode to read Fluent Forms' calculated payment total in real time as the visitor changes items, quantities, or coupons.
Legacy Setup (Per-Form Checkboxes)
If you set up Fluent Forms tracking before this update, your existing per-form checkboxes in Conversion Bridge settings still work as a fallback. They auto-detect the first email field and any First Name / Last Name fields for Enhanced Conversions.
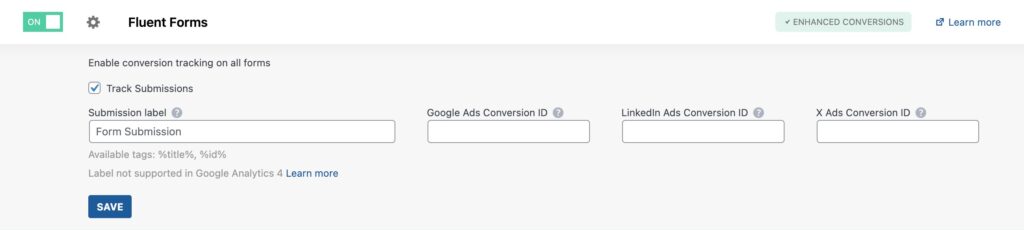
- In your WordPress admin, go to Settings > Conversion Bridge > Integrations.
- Find Fluent Forms in the list and enable it.
- Each form on your site appears as its own option. Enable the checkbox for any form you want to track.
- (Optional) Enter your ad platform conversion IDs (these apply to all forms with the toggle enabled).
- Save your settings.
New forms should be configured through the per-form Integrations tab. The legacy checkboxes are kept so existing setups don't break.
Enhanced Conversions
When a feed is configured (or the legacy checkbox is enabled), Conversion Bridge sends matched form data to your ad platforms for Enhanced Conversions:
- The per-form feed lets you map any field to email, name, phone, and full address — supports the strongest matching available on Meta and Google Ads.
- The legacy auto-detect path uses the first email field and the First Name / Last Name fields it finds.
Including Conversion Journey in Emails
To include the Conversion Journey in any of your Fluent Forms email notifications (we recommend only Admin notification emails), insert the {conversion_journey} shortcode within the email content.

Per-Submission Journey Link
Every tracked submission also gets a "View Conversion Journey" link added to its Fluent Forms entry notes, so you can jump straight from the submission to the visitor's full path through your site.

Still need help?
If you have not yet found your answer in the documentation articles, please contact support
Contact support