Leaky Paywall
Enable conversion tracking in Leaky Paywall
Enabling conversion tracking is simple with Conversion Bridge:
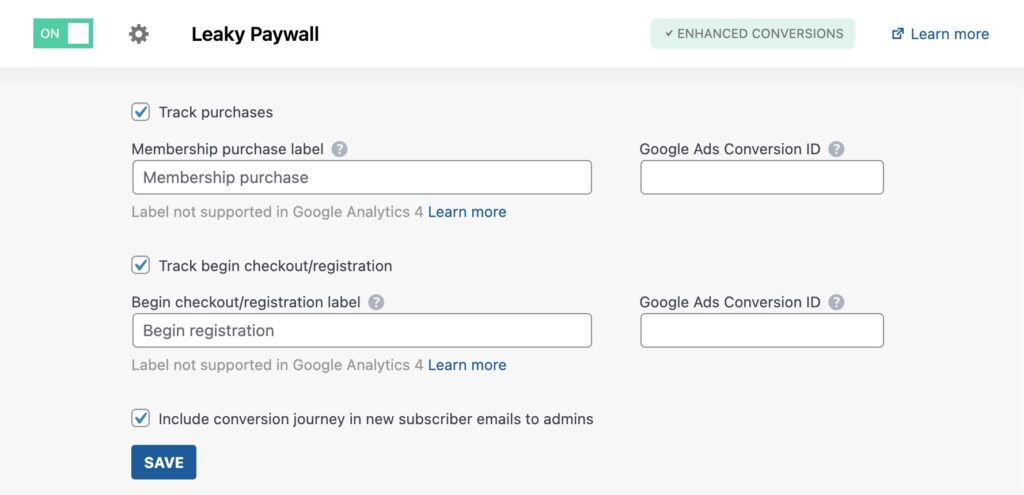
- In your WordPress admin, go to Settings > Conversion Bridge > Integrations
- Turn the integration on with the toggle
- Check the conversion events you want to track
- Purchase
- Begin Checkout
- (Optionally) Enter a custom label and value
- (Optionally) Enter your Google Ads conversion ID

Enhanced Conversions
If you have enabled an ad platform and the respective Enhanced Conversions setting for it, then Conversion Bridge will automatically include the email, first/last name from the purchase information to use for Enhanced Conversions.
Including Conversion Journey in Emails
In the Integration settings for Leaky Paywall, there is a checkbox option to have the customer's Conversion Journey included in the Admin New Subscriber Email.
Common Issues
Purchases are not being tracked
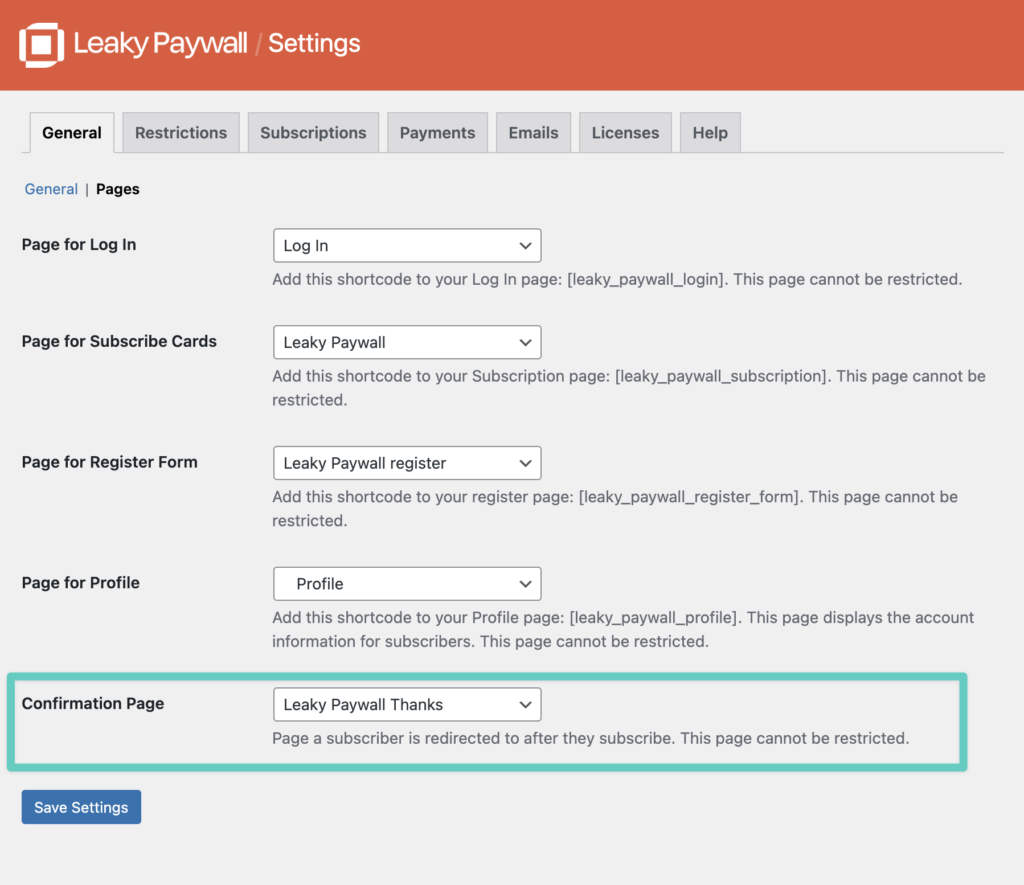
Conversion Bridge checks that the user has landed on the Confirmation Page set within the Leaky Paywall settings. This page must be set as Conversion Bridge processes the conversion tracking when users land on this page after a subscribing.
- In your WordPress admin, go to Leaky Paywall > Settings > Pages
- Check that a page has been set for "Confirmation Page"

Still need help?
If you have not yet found your answer in the documentation articles, please contact support
Contact support