
Conversion Bridge works with the iubenda consent banner so your conversion tracking respects visitor consent choices. When iubenda is active, tracking is held until a visitor accepts the matching purpose through the banner.
Setup Instructions
Step 1: Set Up iubenda
- Install and activate iubenda's consent plugin and connect it to your iubenda account
- In your iubenda settings, make sure the banner is set to ask for consent before tracking runs
- iubenda groups tracking into numbered purposes — the ones that matter here are Measurement (analytics) and Targeting & Advertising (marketing)
Step 2: Select iubenda in Conversion Bridge
- Go to Settings → Conversion Bridge → Options in your WordPress admin and find the Cookie Consent section
- Select iubenda as your cookie consent plugin
- Save your settings
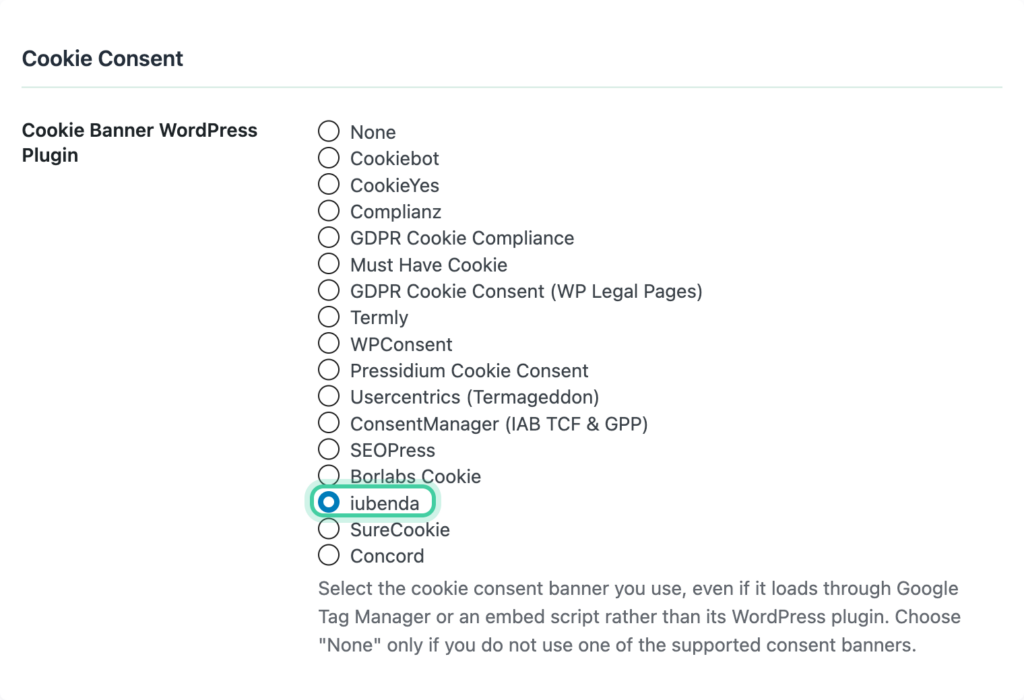
Conversion Bridge automatically detects iubenda once the plugin is active.
Step 3: Configure Consent Signal Ownership
Consent signals tell each platform whether a visitor has given permission to be tracked. Both iubenda and Conversion Bridge can send these signals, but only one should do it for each platform — otherwise you get conflicts.
We recommend setting Conversion Bridge as the signal owner for your non-Google platforms. Conversion Bridge listens to the consent choices visitors make through iubenda and sends the right signals to every platform you have enabled.
- Go to Settings → Conversion Bridge → Options, Cookie Consent section
- Set each platform to Conversion Bridge ownership
When iubenda is active, Conversion Bridge lets iubenda manage Google Consent Mode for Google Analytics, Google Ads, and Google Tag Manager, since iubenda runs its own region-aware Consent Mode for Google's tags. If you would rather Conversion Bridge handle consent for those Google platforms, switch them to Conversion Bridge ownership in the consent settings.
Learn more in the Consent Signal Ownership guide.
Step 4: Verify It Works
- Open your site in a private/incognito browser window
- You should see the iubenda consent banner
- Decline and confirm that no tracking fires
- Accept and confirm that tracking starts
You can add ?cb_console=1 to any page URL to see consent and tracking activity in your browser's developer console.
How It Works
- iubenda lets visitors give consent per purpose, so a visitor can allow analytics without allowing advertising.
- When a visitor accepts the Measurement purpose, your analytics platforms start tracking.
- When a visitor accepts the Targeting & Advertising purpose, your ad platforms start tracking.
- If a visitor accepts everything at once, both analytics and ad tracking turn on together.
- When they decline, no matching tracking runs.
- If a visitor changes their preferences later, tracking updates right away to match.
Consent Category Mapping
iubenda's purposes map to Conversion Bridge like this:
| iubenda Purpose | Conversion Bridge Type | Examples |
|---|---|---|
| Measurement | Analytics | Google Analytics, Plausible, Clarity, Hotjar |
| Targeting & Advertising | Marketing | Google Ads, Meta Ads, TikTok Ads, LinkedIn Ads |
Conversion Bridge reads these purposes from iubenda and applies them to all your enabled platforms automatically.