
Google Ads doesn’t track anything on its own. Before you can record a purchase, form submission, or any other important action, you have to create a conversion event inside your Google Ads account. This tells Google what you want to measure and gives you the details needed to track it on your site.
There are a few ways to handle this, but the easiest and most reliable path in Conversion Bridge is to set up a Conversion Label for each action you want to track. Once that label exists, Conversion Bridge can take care of firing the event at the right time, passing the right value, and sending enhanced data when needed.
If you prefer working through Google Analytics, you can also mark events as Key Events in GA4 and import them into Google Ads. Both methods work, but the direct Conversion Label approach keeps things cleaner and avoids extra steps.
This video walks through both examples on this page on a real store, a WooCommerce purchase and a WS Form contact form, each with its own conversion action:
Using a Conversion Label
A Conversion Label in Google Ads is a unique identifier that helps track and measure specific actions or conversions on your website. When you set up conversion tracking in Google Ads, you create a conversion action (like a purchase, form submission, or sign-up), and Google Ads assigns a Conversion Label to this action. You will need to set up a Conversion Label for each unique conversion action on your site.
This Google Ads Conversion Label is different from Conversion Bridge's own per-event Conversion Label and Conversion Value fields, which control how events are named in your analytics platforms.
To create a conversion action and get its Conversion Label:
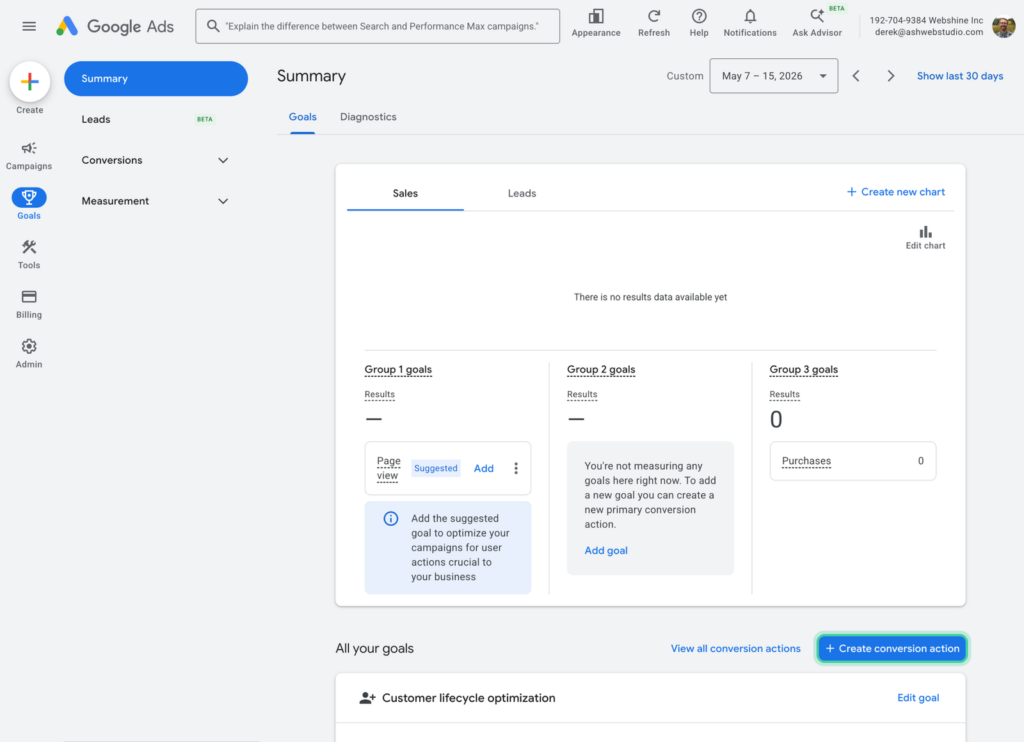
- In Google Ads, click Goals in the menu on the left, then click Create conversion action on the Goals summary page.
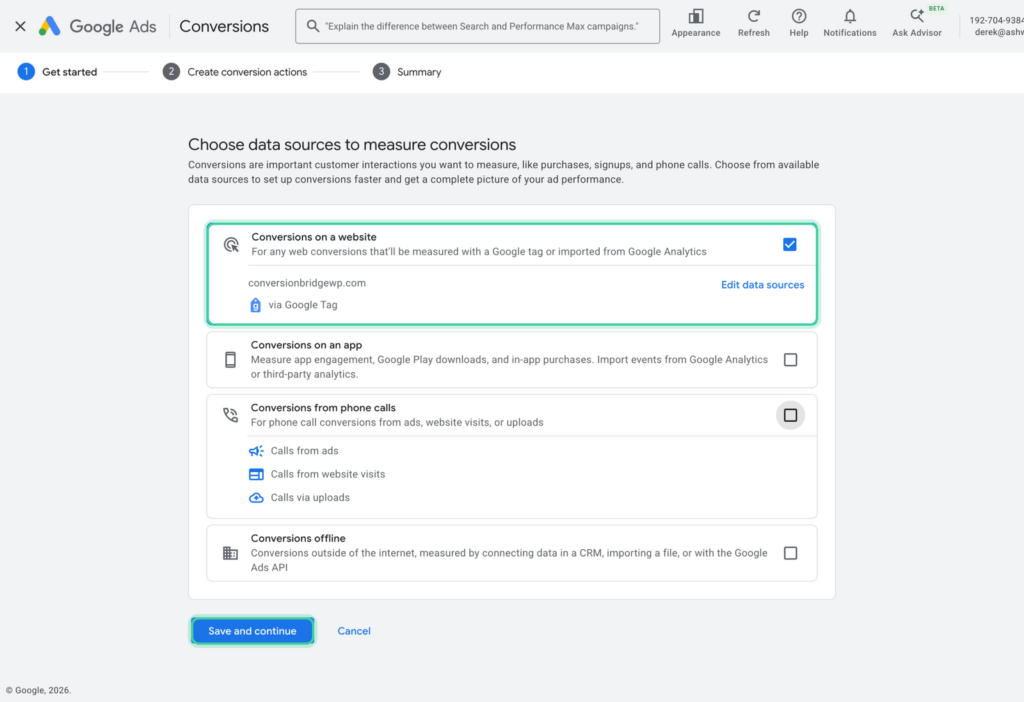
- Google asks where your conversions happen, so make sure Conversions on a website is checked, then click Save and continue.
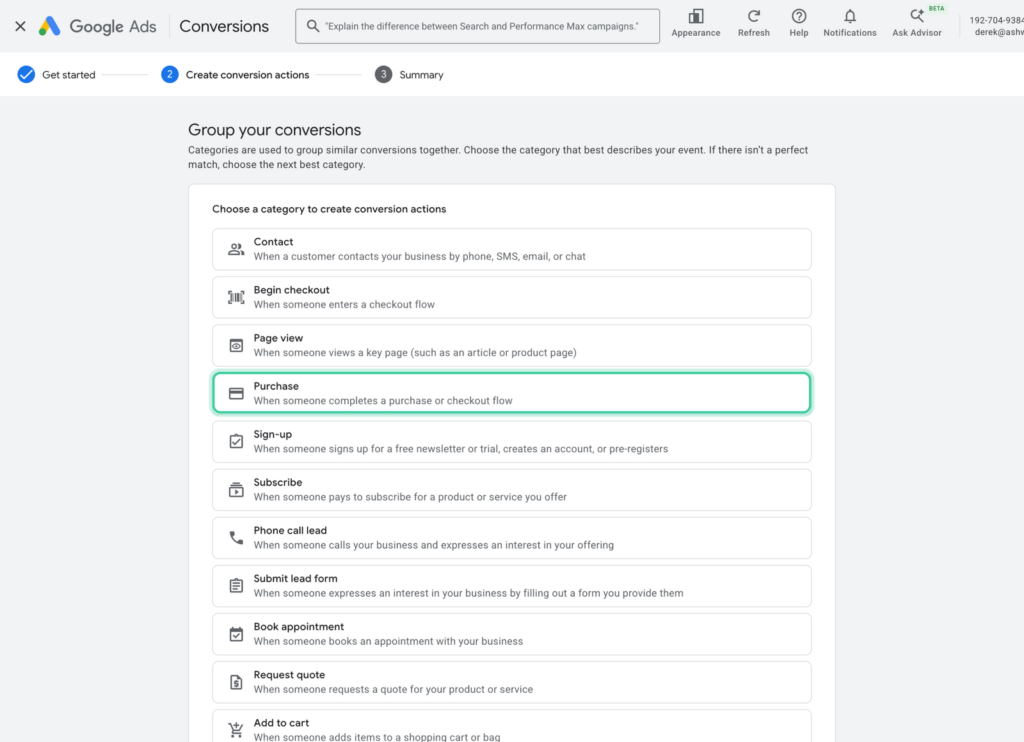
- Pick the category that fits what you're tracking, like Purchase for orders or Submit lead form for form entries.
- Click Create conversion and choose your website as the data source.
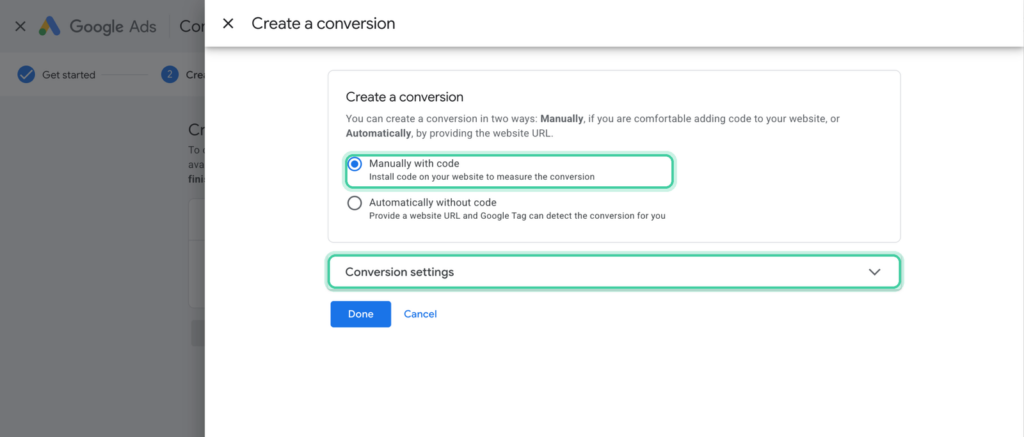
- Choose Manually with code, since Conversion Bridge adds that code for you.
- Click Conversion settings to open the rest of the options, set the value (the examples below show which to pick), and click Done.
- Click Save and continue, and Google shows a code snippet. The only part you need from it is the Conversion Label.
Example: WooCommerce purchases
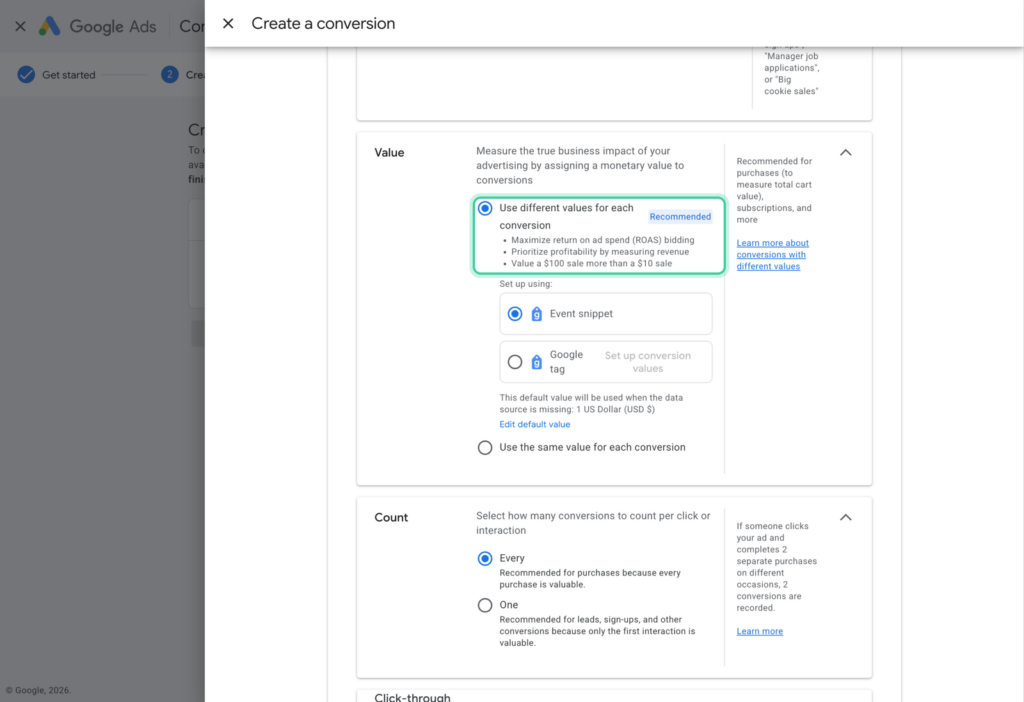
For WooCommerce, pick Purchase as the category. Under Value, choose Use different values for each conversion so every order total comes through to Google Ads.
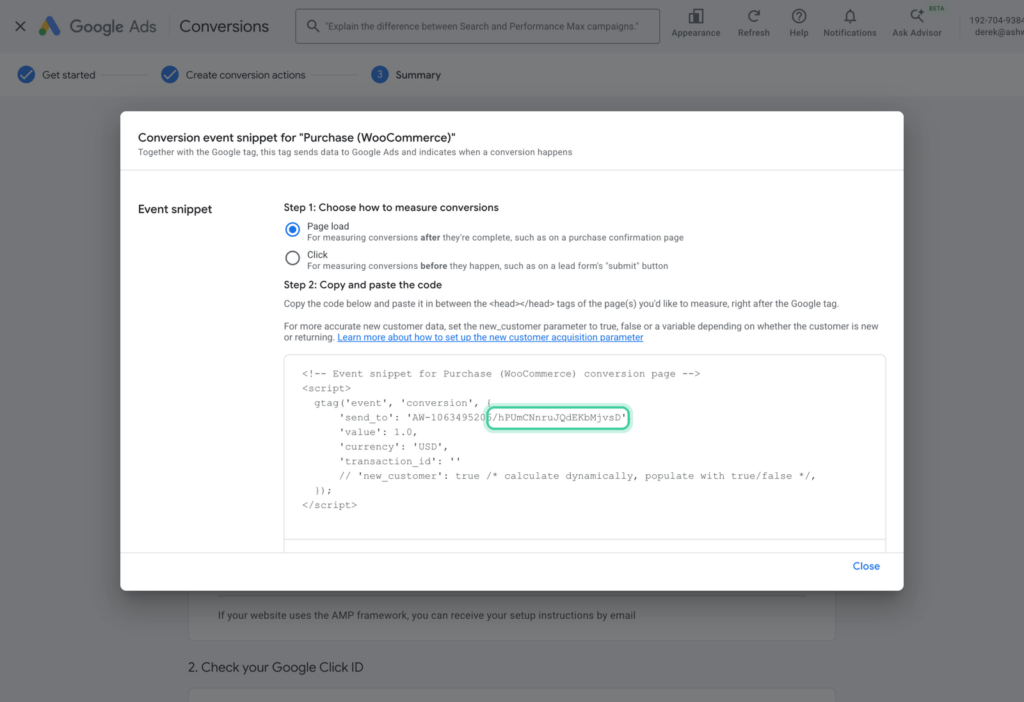
After you save, copy the Conversion Label from the snippet. It's the part of the send_to value after the slash, so in AW-123456789/AbC-dEfGhIjK the label is AbC-dEfGhIjK. Don't paste the full value with the AW- ID in front, since Conversion Bridge already adds that from your Destination ID.
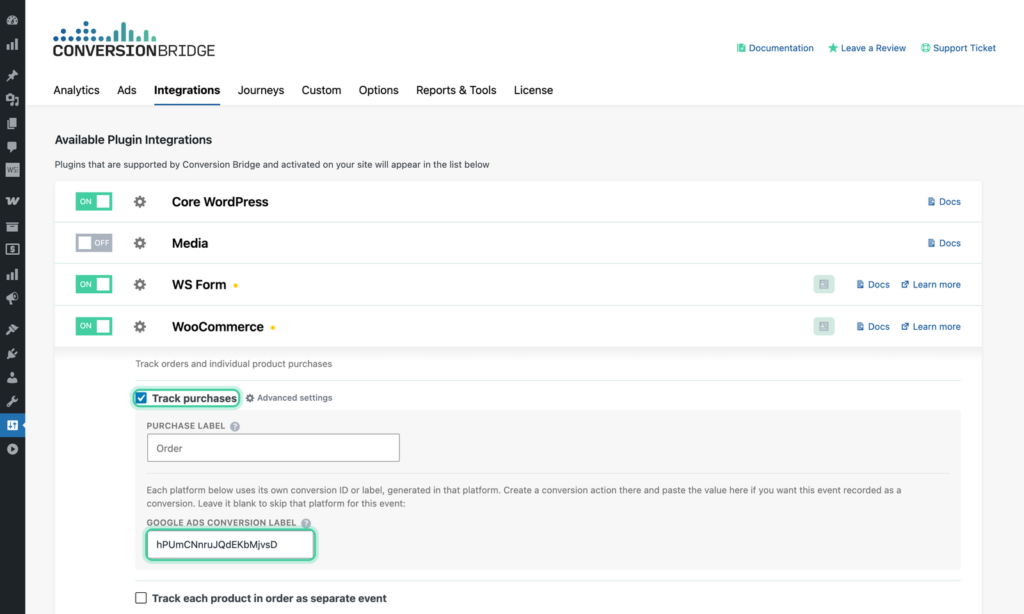
In WordPress, go to Settings → Conversion Bridge → Integrations and open WooCommerce. Make sure Track purchases is checked, click Advanced settings next to it, paste the label into Google Ads Conversion Label and save. Now every WooCommerce order is sent to Google Ads with its order total.
Example: WS Form contact form
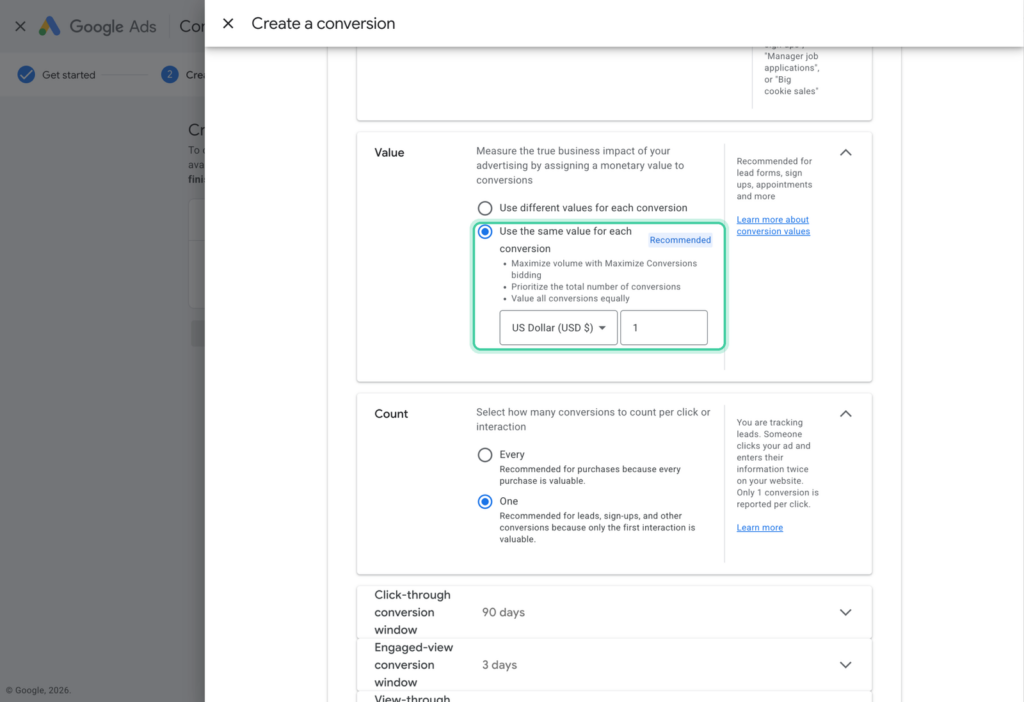
For a contact form, go through the same steps and pick Submit lead form as the category. A form entry doesn't have an order total, so choose Use the same value for each conversion and change the amount to what a lead is worth to you.
Copy the Conversion Label from the snippet the same way. Then in Conversion Bridge, open the WS Form integration, make sure your form is checked (Contact Us in this example), click Advanced settings next to it, paste the label into Google Ads Conversion Label and save.
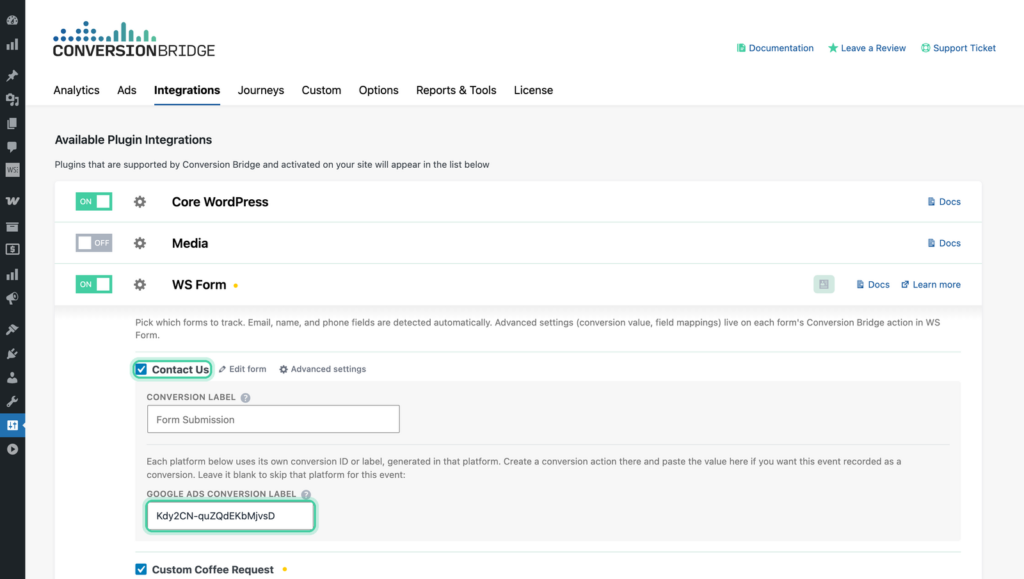
This is the same setting you'll find on the form's Conversion Bridge action in WS Form, so you can change it in either place.
With Google Analytics
If you are using Google Analytics, you can set Key Events to be your conversion for an ad. Conversion Bridge will send various events into GA4 and the first step is to mark those events as Key Events.
Setup in Google Analytics 4
- In Google Analytics, go to the Admin screen
- Find the Events section
Here you will see a list of events that have been recorded for your site. If you have been using Conversion Bridge for a while to record conversion events, you will see these here.

Example of Events section in Google Analytics 4
In the right column you will notice the "Mark as key event" - toggle this to mark the event as a Key Event, which is the new term for a conversion in Google Analytics 4.
Setup in Google Ads
In Google Ads:
- Go to the Goals tab
- Click on "New conversion action"
- Click on "Website"
- Enter your domain
It will automatically detect that you have Google Analytics 4 on the site and give you options to select from your Key Events you have set up:

Tracking Button Clicks as Google Ads Conversions
You can fire a Google Ads conversion event when a visitor clicks any button or link on your site. Conversion Bridge does this through Custom Events, with no code required.
The setup:
- In Google Ads, create a conversion action for the click (following the Conversion Label steps above) and copy its Conversion Label
- In Conversion Bridge, create a Custom Event with the Click type and enter the CSS selector for your button (e.g.,
.request-demo-btn) - In that custom event's settings, paste the Google Ads Conversion Label
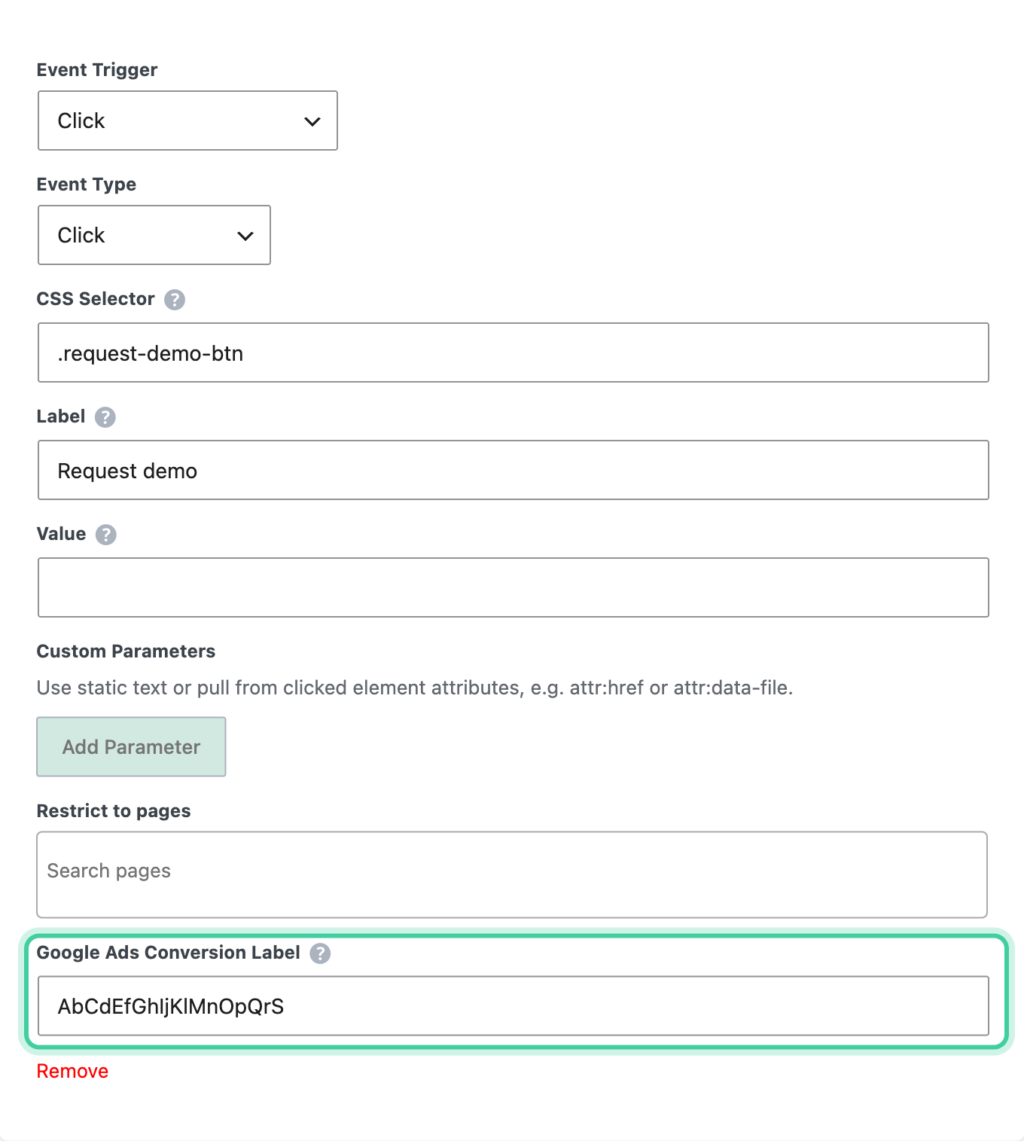
When someone clicks the button, Conversion Bridge fires the conversion to Google Ads with the label you set, so the click is recorded against that specific conversion action. You can also set a value on the event if the click is worth a dollar amount to you.
Using a Conversion Event for Specific Ads
By default, Google Ads applies all of your primary conversion actions across every campaign. This means if you have a purchase conversion and a lead form conversion, both will be used to optimize every campaign you run. That works fine if all your campaigns share the same goal, but it becomes a problem when they don't.
For example, if you run one campaign to drive purchases and another to collect leads, you don't want your lead campaign optimizing for purchases or vice versa. Campaign-level conversion goals let you tell Google Ads exactly which conversion action matters for each campaign, so Smart Bidding optimizes for the right outcome.
Setting a Conversion Goal for a Specific Campaign
Once you have your conversion actions set up (either through a Conversion Label or Google Analytics), you can assign them to individual campaigns:
- In Google Ads, open the campaign you want to configure
- Click the Settings tab
- Scroll down to the Conversion goals section and expand it
- Change the dropdown from Account-default to Campaign-specific
- Click Choose campaign goals and pick the conversion actions that apply to this campaign — for example, only "Purchase" for a sales campaign, or only "Submit Lead Form" for a lead generation campaign
- Click Save
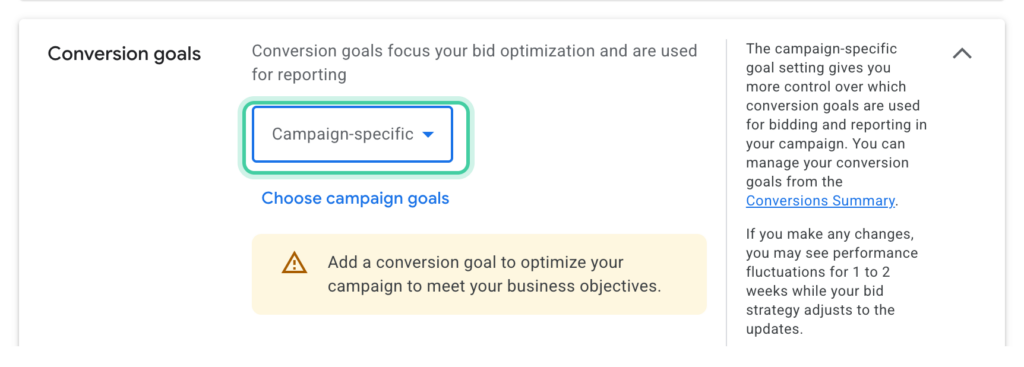
Any conversion actions you don't select will still be tracked for that campaign, but Google Ads won't use them to optimize your bidding. They'll appear in the "All conversions" column in your reports but won't influence how your ads are served.
When to Use Campaign-Level Goals
This is useful any time your campaigns serve different purposes:
- Separate purchase and lead campaigns — A shopping campaign should optimize for purchases, while a lead gen campaign should optimize for form submissions. Without campaign-level goals, both campaigns try to optimize for both, diluting performance.
- Different products or services — If you have different conversion actions for different product lines, you can make sure each campaign only counts the conversions that are relevant to what it's advertising.
- Top-of-funnel vs bottom-of-funnel — An awareness campaign might optimize for newsletter signups, while a retargeting campaign optimizes for purchases.
What This Means for Conversion Bridge
No extra configuration is needed in Conversion Bridge. Conversion Bridge fires the conversion event with the correct Conversion Label whenever the action happens on your site. The campaign-level goal setting in Google Ads controls which of those events each campaign pays attention to for bidding optimization.
So the setup is:
- Create your conversion actions in Google Ads (each with its own Conversion Label)
- Enter each Conversion Label into the corresponding Conversion Bridge integration setting
- In Google Ads, assign the right conversion actions to the right campaigns
Conversion Bridge handles step 2 — making sure the events fire correctly on your site. Step 3 is handled entirely within Google Ads.
Enhanced Conversions
Within Google Ads you will need to enable the Enhanced Conversions setting and agree to their terms. To enable it:
- In Google Ads, go to Goals → Conversions → Conversion settings
- Find the "Enhanced Conversions" section and enable the setting
- The setup method does not matter, Conversion Bridge is doing this for you
- Save

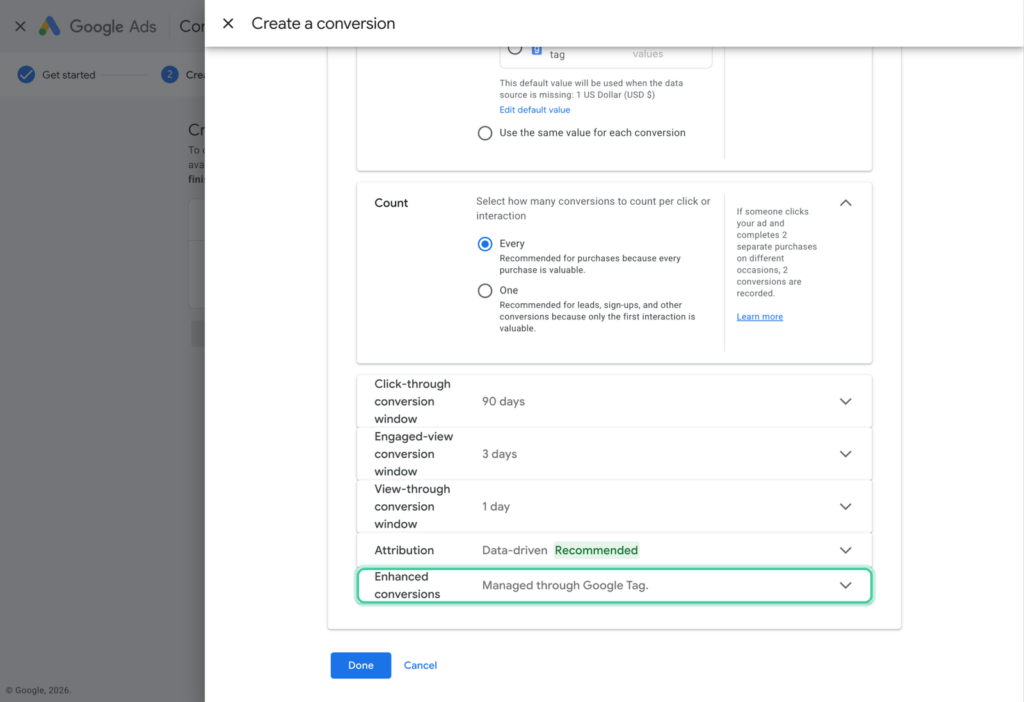
Once it's on, each new conversion action shows Enhanced conversions: Managed through Google Tag in its conversion settings, and there's nothing else to change there.
Confirming Conversions
You may not be sure if conversions are actively tracking and there are steps you can take to confirm if conversions are being tracked.
Confirming Status
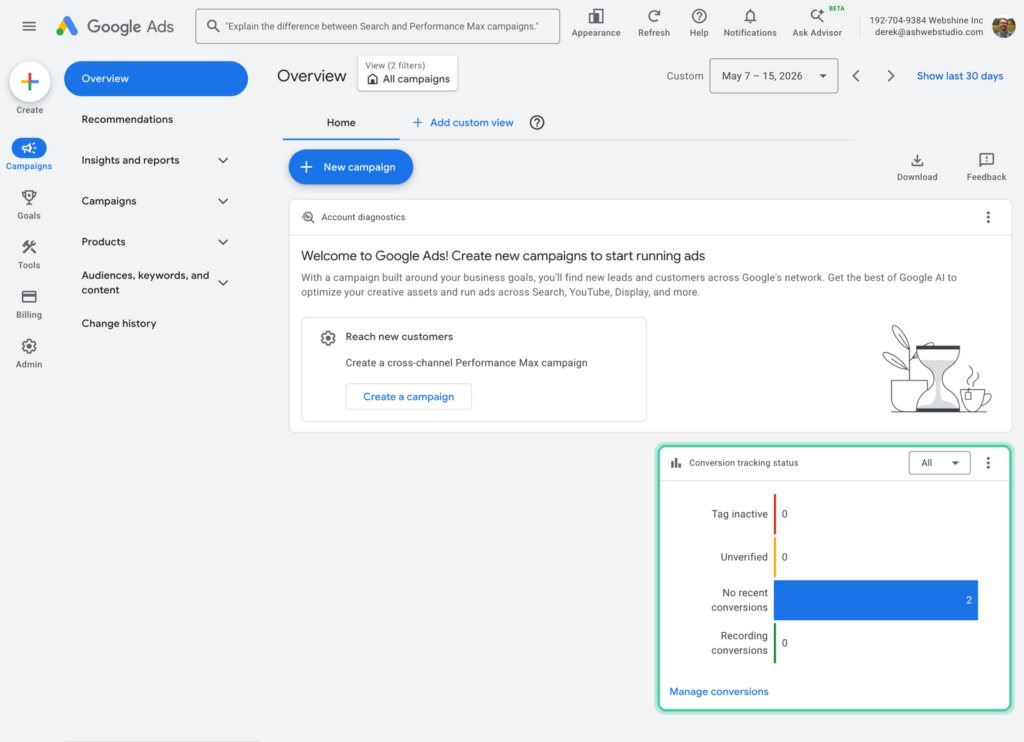
The Conversion tracking status card on your Google Ads overview shows how many of your conversion actions are in each status:
- No recent conversions - Google can see your tracking, but no conversions from an ad click have come in over the last 7 days. This is what you'll see right after setup.
- Recording conversions - Conversions from ad clicks are coming in. It changes to this once someone clicks one of your ads and then buys or fills out the form.
- Needs attention - No conversions have been tracked yet and there may be an issue.
Troubleshooting Conversions
If you see the "Troubleshoot" button next to a conversion, click it to begin the walkthrough steps to test your conversion tracking. What this does is open up Tag Assistant and have you go through the steps to trigger the conversion action (form submission, purchase, button click, etc) on your site while Tag Assistant is "watching". Once Tag Assistant recognizes the conversion event being triggered it will update the status to "No recent conversions" and you know conversions are being properly tracked.
Running a Real Test Conversion
Google Ads only counts a conversion it can tie to a real click on one of your ads. A test visit with a made-up click ID (like ?gclid=test123 on the end of your URL) still sends the conversion to Google, but it won't show up in your reports or change the status to "Recording conversions," because there's no ad click to match it to.
So a conversion only shows up in your reports once it starts from an actual ad click. When your ads are running, the status changes to "Recording conversions" on its own as people click and convert. Until then, the Troubleshoot steps with Tag Assistant are the way to confirm your tracking works.
If Tag Assistant doesn't see the conversion fire, the next step is to enable logging and open a support ticket for it to be further investigated.