
When you activate Conversion Bridge, a setup wizard opens and walks you through each step. Most sites are tracking conversions within a few minutes.
Every step of the wizard saves to the same settings you'll find later under Settings → Conversion Bridge. Each section below names the tab where that step lives, so you can come back and change anything, or set it up there if you skipped the wizard.
This video shows the whole setup on a real store, start to finish:
Enter your license key
The first step of the wizard asks for your license key. It's also on the License tab. You'll find it in your purchase confirmation email or in your account. Once it's saved, you can move on to your platforms.
Choose your analytics platforms
On the Analytics tab, turn on each analytics platform you use, like Google Analytics or Plausible. Click the gear icon to open its settings. Each platform needs something a little different, like a measurement ID or a site domain. Conversion Bridge adds the platform's tracking code to your site for you, so there's nothing to paste into your theme.
You can turn on as many platforms as you like. Every conversion is sent to all of them, so trying out a new platform doesn't mean losing data in the one you already use.
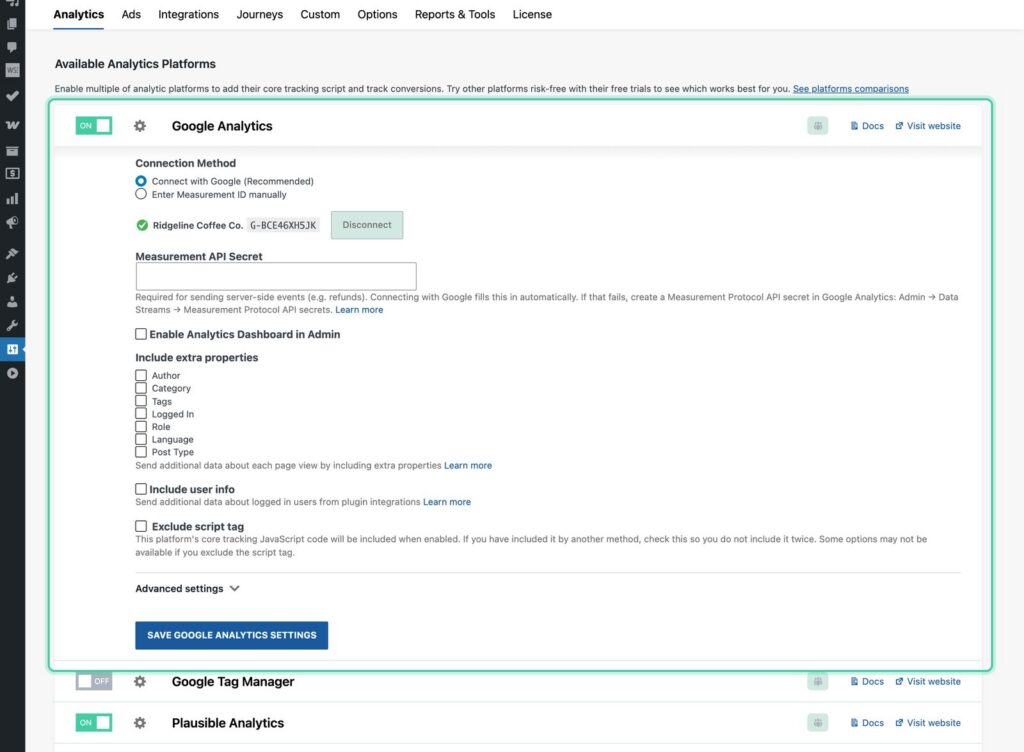
See the settings for each analytics platform
Choose your ad platforms
On the Ads tab, turn on the ad platforms you run campaigns on, like Google Ads or Meta Ads, and add your pixel or tag ID. Some ad platforms also take an access token. With one, Conversion Bridge sends each conversion from your server straight to that platform as well, so it still gets counted when a browser or ad blocker stops the pixel.
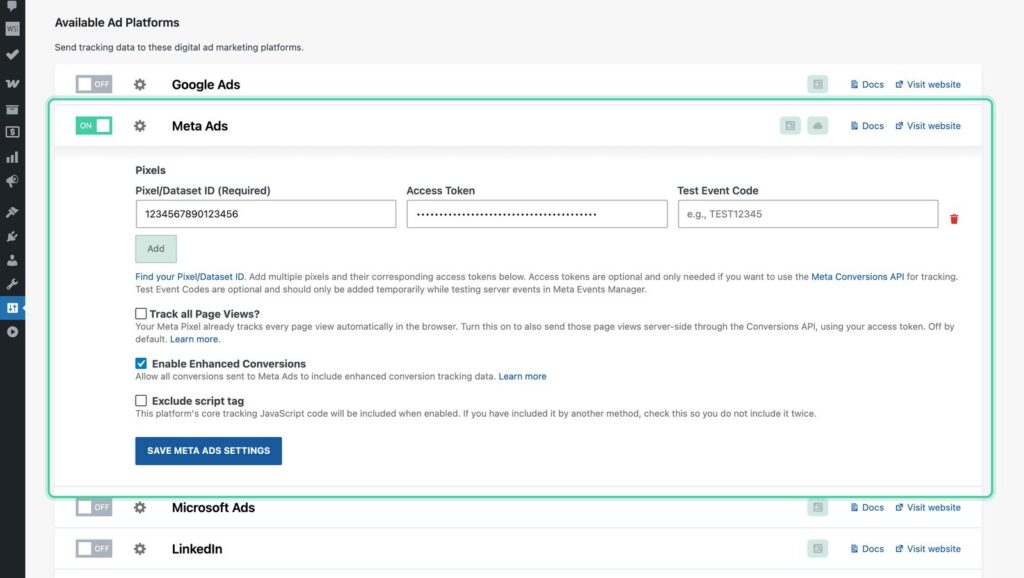
See the settings for each ad platform
Pick your cookie consent banner
If your site uses a cookie consent banner, pick it from the list. In the settings, this is in the Cookie Consent section of the Options tab. Conversion Bridge then waits for each visitor's choice before tracking them. If you don't use one of the listed banners, leave this set to None.
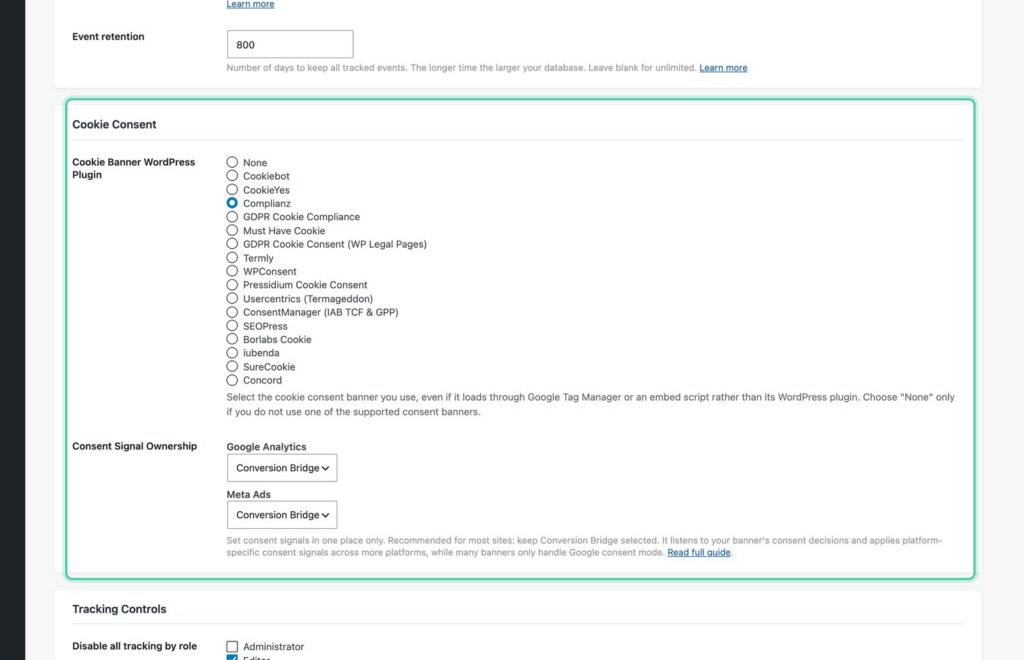
See the supported cookie consent banners
Turn on your plugin integrations
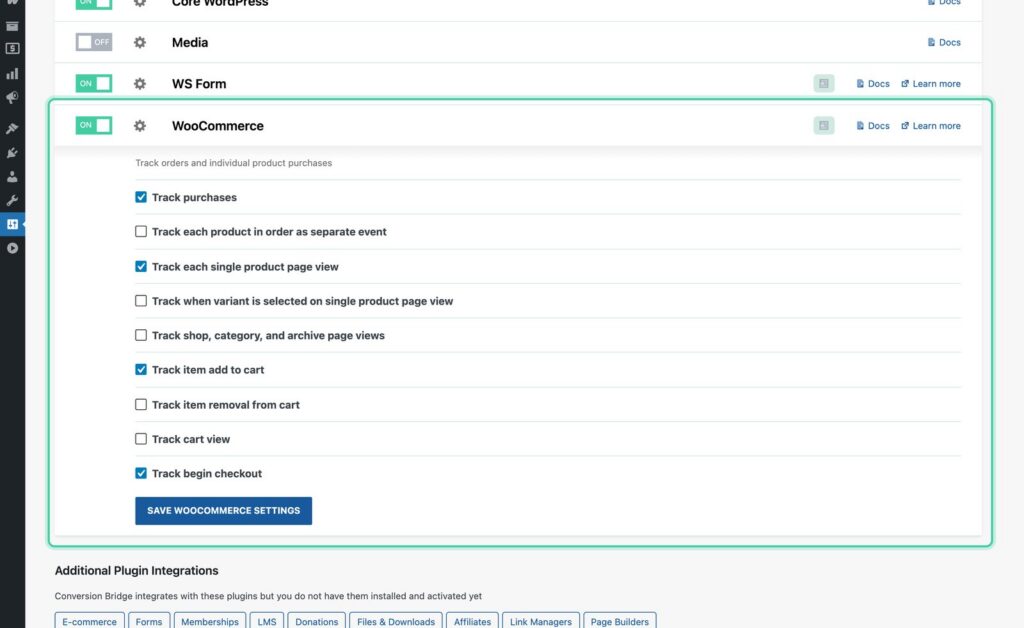
The Integrations tab lists the plugins Conversion Bridge works with that are active on your site. Turn on each one you want to track, then choose what to track. For WooCommerce, that could be purchases, add to cart, and checkouts.
For form plugins, check the forms you want to track. Name, email, and phone fields are found automatically and sent to your ad platforms with each conversion. You can also map specific fields in each form's own settings.
Finish setup
In the wizard, click Finish. Your site is now tracking conversions in every platform you turned on. The summary shows each event you're tracking and every platform it's sent to.
Track buttons and page builder elements
You can track clicks on a Button block right in the block editor. Select the button, turn on Conversion Tracking in the sidebar, and give it an optional label. Learn more about tracking blocks
Page builders like Elementor work the same way. The tracking settings live inside the builder, on the button, form, or other module you want to track.
Track anything else with custom events
For anything without a plugin integration, go to the Custom tab. Pick a trigger, like a click, scrolling to part of a page, or time spent on a page. Then add a CSS selector, a label, and an optional value, and choose which pages it runs on.
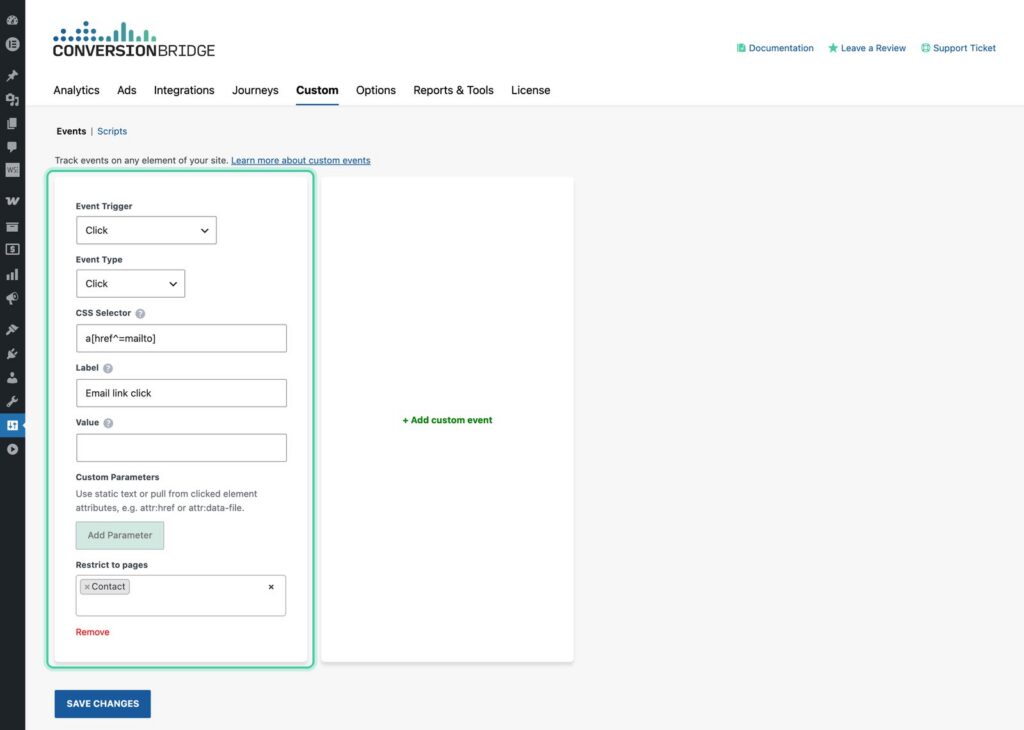
Learn more about custom events
See the journey behind each conversion
Every conversion records the pages the visitor viewed before converting. The Journeys tab lists each one, along with the campaign and site that sent the visitor. Open one to see every page they viewed, in order.
Conversion Bridge also adds the journey to each plugin's own screens where it can, like a WooCommerce order or a form entry.
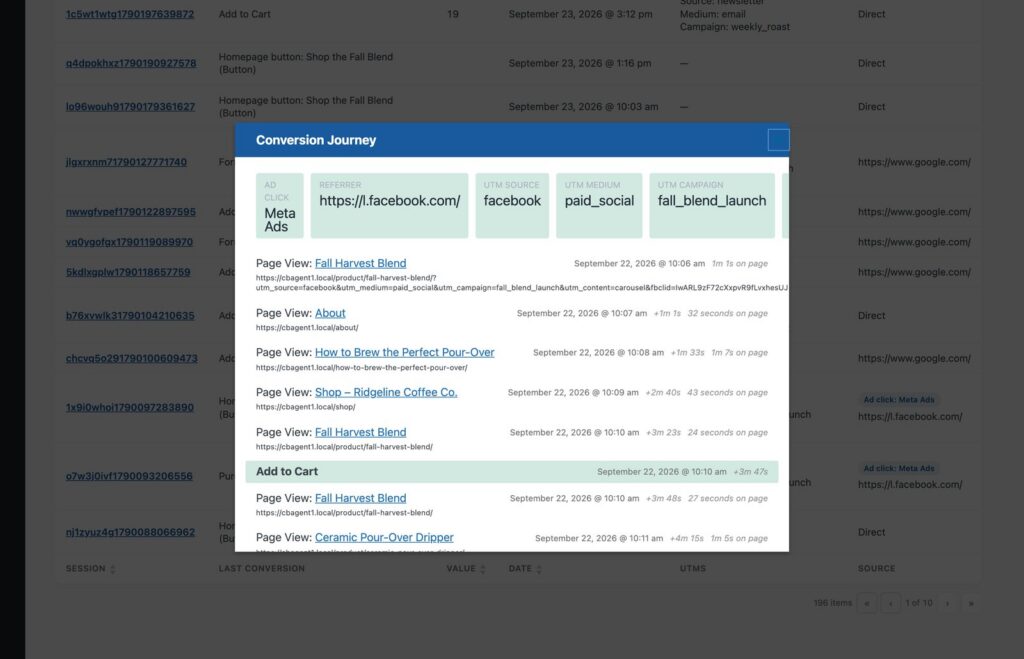
Learn more about conversion journeys
Check your reports
Under Reports & Tools, the Overview shows your conversions, value, and sessions over time. It also shows your top traffic sources and the landing pages that lead to the most conversions. UTMUTM parameters are tags added to a link that show where traffic comes from and which campaigns lead to real conversions. Reports break down each campaign so you can see which ones are paying off.
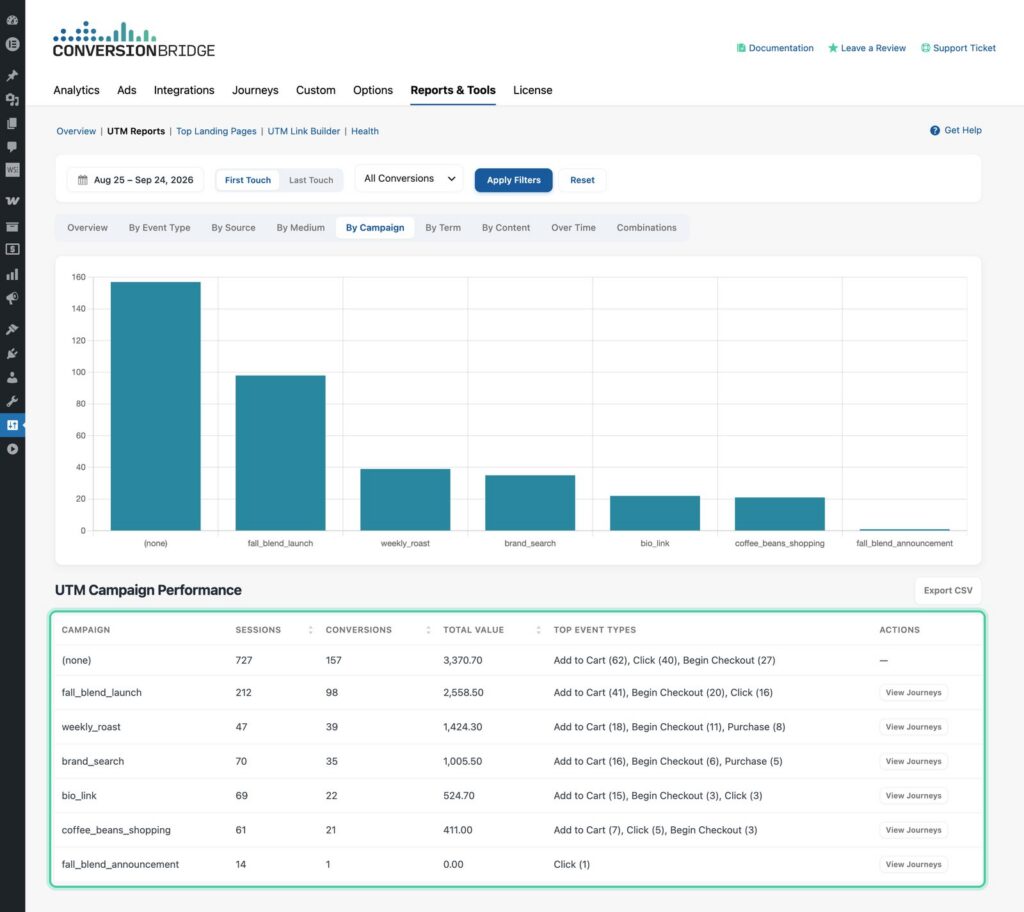
Learn more about the Overview report and UTM Reports
Other options
The Options tab has a few settings you may want early on:
- Disable all tracking by role stops tracking for roles you pick, like administrators, so your own visits don't count in your stats.
- Disable all tracking by environment stops tracking on staging or development copies of your site.
Some analytics platforms can also show their dashboard inside your WordPress admin. See which platforms support this